Tuesday, July 9, 2013

The Lined Knit Top, Version 1 - Original and Version 2 - 1 Yard Frankenpattern Palmer Pletsch McCalls 6282


 This pattern looks so simple, well it's not really that simple.  It is lined, I like the lining, it cuts down on the clingy property of the poly knit I used.  So you don't see bra markings as you would with say a simple t-shirt.    
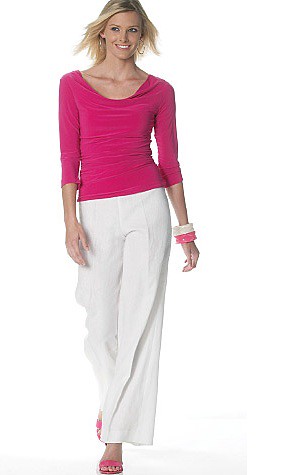
Mccalls 6282

The lining and fabric are joined at the neckline to start, then you gather around the center back and side seam waist.  You are told to pull the lining out of the way as you assemble the body, and lastly, you assemble the lining, then you pop in the sleeves.  I will treat the lining and body as one next time, and remove the gathers, just to change things up.  After I posted the review, Pati contacted me to let me know that the pattern could be used with or without the lining (as you will see below).

Here is an interesting detail, that I think many might be squeamish to try, but one of the reasons I like the Palmer Pletsch patterns.  They are mini tutorials.

The instructions recommend using contrast colored thread for the shirring.  It's a great idea, since you can see exactly where the stitching line is and it helps you line it up for joining the side seams.
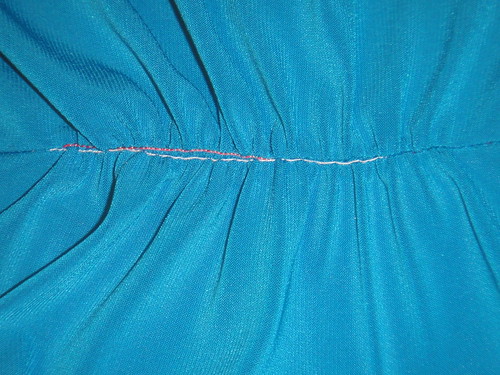
6283

Then you pull it out, which isn't difficult at all, and your gathers are perfect.
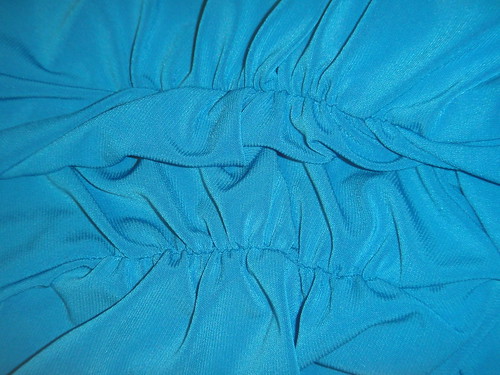
6284


The 1 Yard Frankenpattern
I only had 1 yard of this lovely rayon knit and needed to make the pattern fit. I decided to remove the shirring, lining, and made it a cap sleeve. There are 5 pieces to this pattern, when you look at them side by side, the body pieces are longer than the lining. That's because the shirring lengthens the piece.


Front Pieces

For the front, I traced off the body piece, from the side seam notch up (armhole, neckline), and the lining piece from the side seam notch down. This gives me the fold over for the cowl (for a clean finish), and eliminates the shirring.


 I used the lining piece for the back of the t shirt.


The sleeve piece I placed on the fabric, as much as I could to capture the cap and 4" down the sleeve seam. I later played with it, folding it up to make it even shorter to get the right sleeve length.  They have a short sleeve option, but I just didn't have enough to make it.

This was a perfect solution for me, because I knew the pattern already fits, I like the armhole and sleeve draft, and it all fit on 1 yard of fabric.

Thursday, July 4, 2013

Vogue 1282 The Red Slinky Cowl

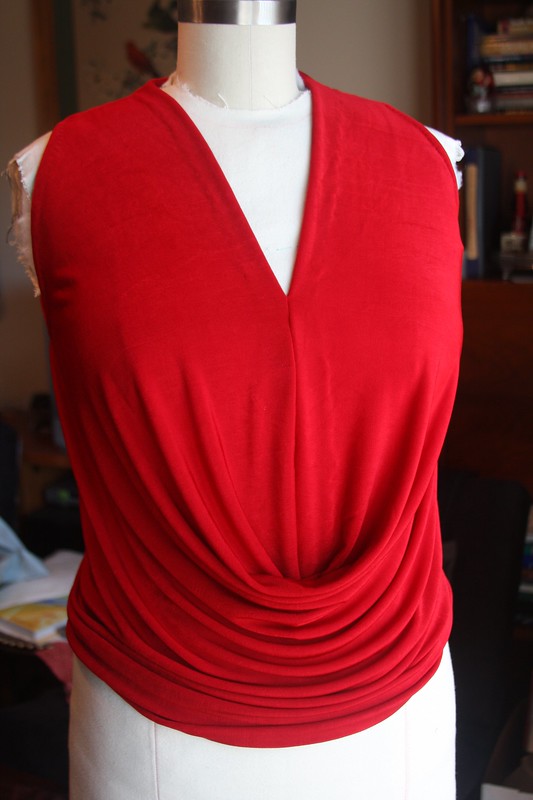
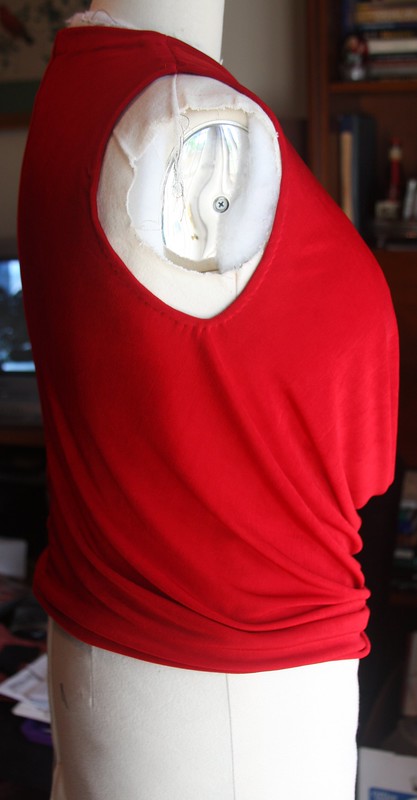
My first time working with acetate slinky and I really liked the drape and loved the color.  So I left it open instead of sewing it up the front to wear it layered.  Part of the reason for this was that the slinky grew, and the armholes were very low, so you couldn't wear it alone.  The temperatures here have not really cooled off and thinking about wearing layers makes me break out in a cold sweat, so, after having it lie in the closet for a month without wearing I decided to tackle it one more time.

Vogue 1282

This is the only photo that comes close to the true color (above)... gorg!!

Vogue 1282


Vogue 1282

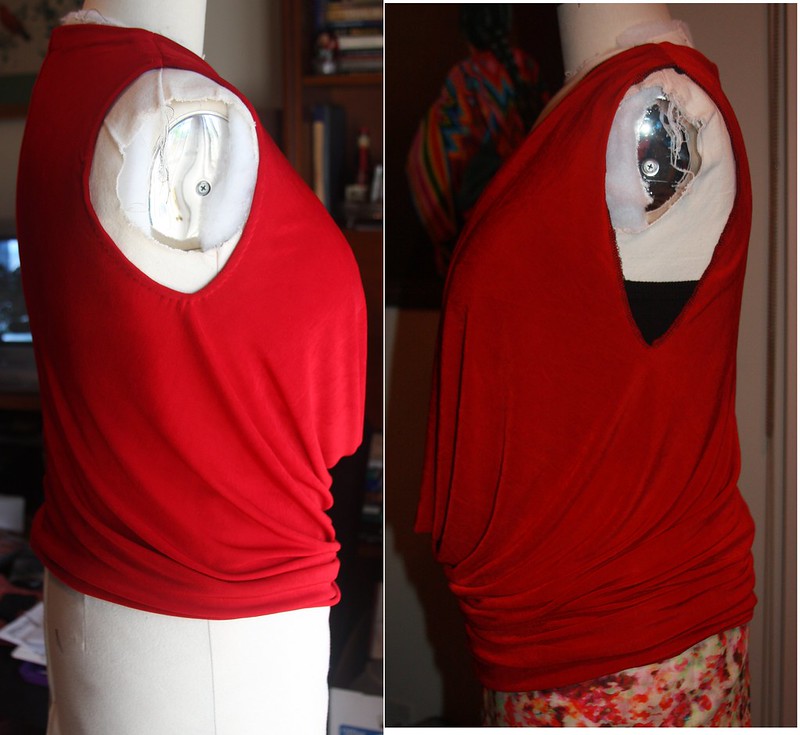
Raised armhole required trimming the shoulders
Vogue 1282

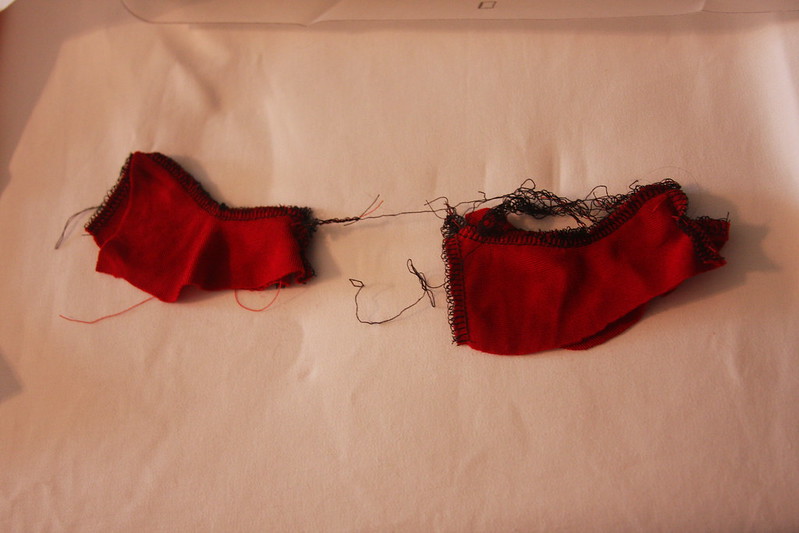
I managed to trim off all of the black serger thread, you could actually see it through the fabric.

Vogue 1282

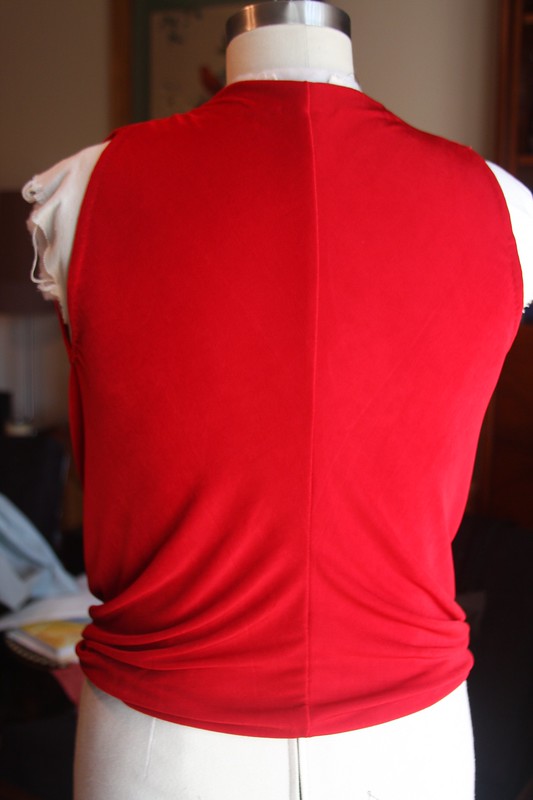
Now I have a top that I can wear alone, without layering, and that doesn't require a cami beneath to hide the fact the armholes were huge.

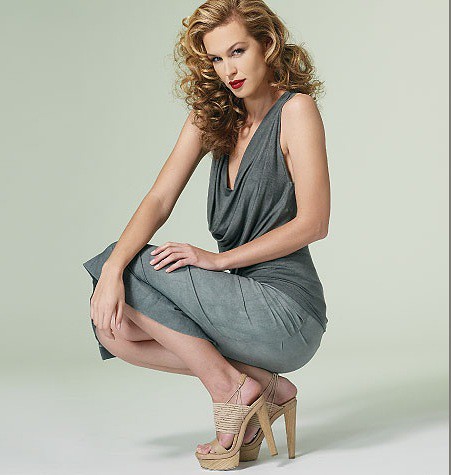
The pattern pic.
Vogue 1282

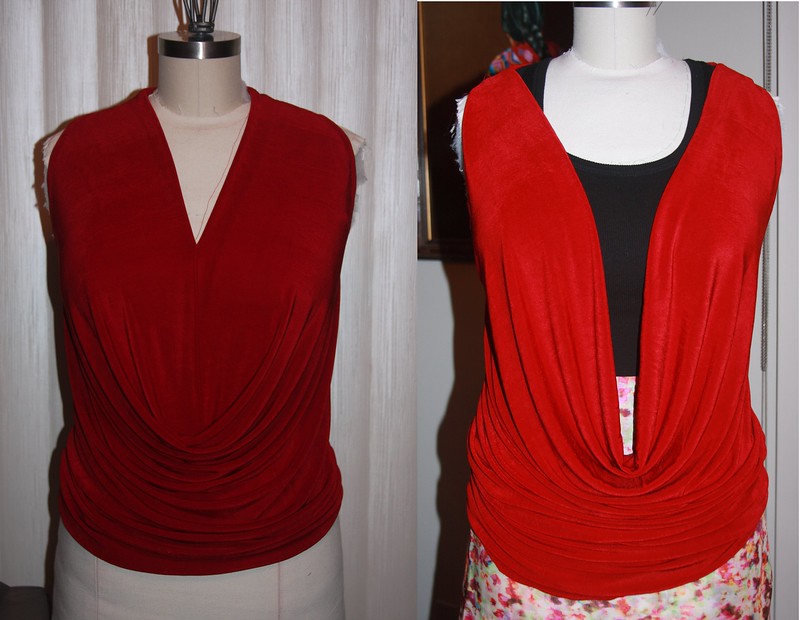
Here are some side by sides original vs altered.
Vogue 1282 front side by side
On the right, I had lengthened the top 6" just to use up the entire yard of slinky and to experiment with the drape.  On the left, it is very close to the pattern length.

vogue 1282 armhole side by side

It's also notable that this really isn't the fabric recommended by the pattern envelope (which states 2 way stretch).  Slinky is a whole different animal which is likely why the armholes grew.


Monday, July 1, 2013

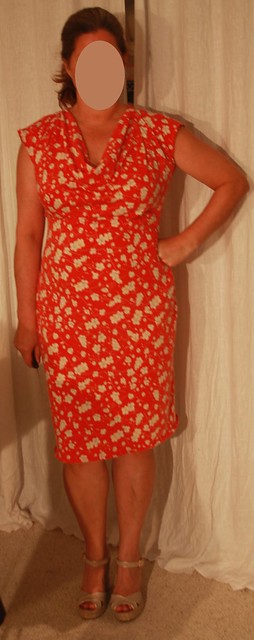
Vogue V1250 DKNY Cowl Dress with Alteration Notes

1250 fitted


This pattern has been extremely popular, I made it and didn't have as much success the first time around.


It takes 2 yards, and sews up in about two hours and  the original review is below. Many versions I've seen have been made up in ITY (which has 4 way stretch), I used a rayon jersey (2 way stretch - which the pattern specifies) which didn't have the same drape.

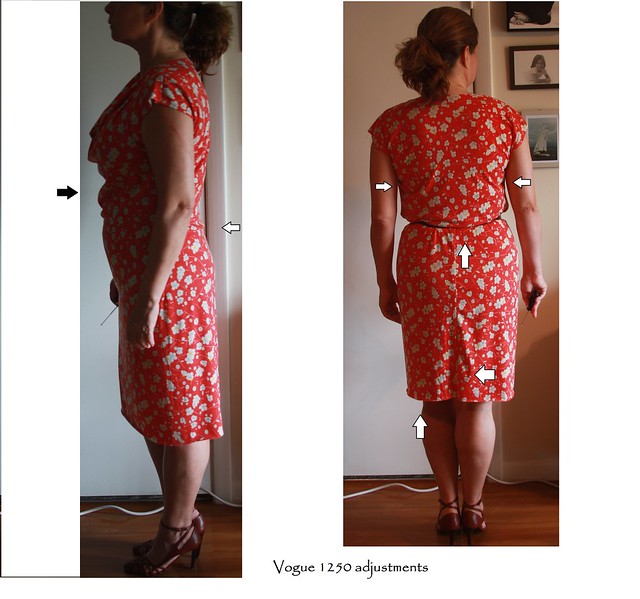
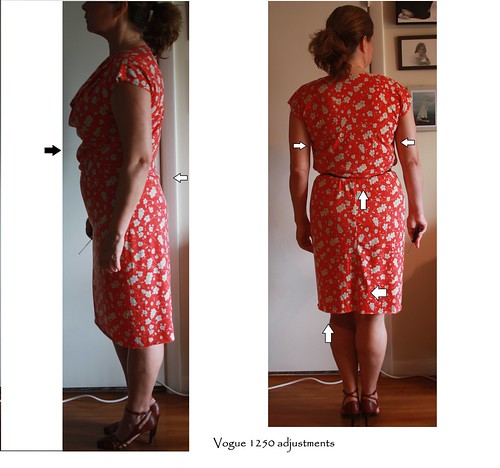
Vogue 1250 adjustments

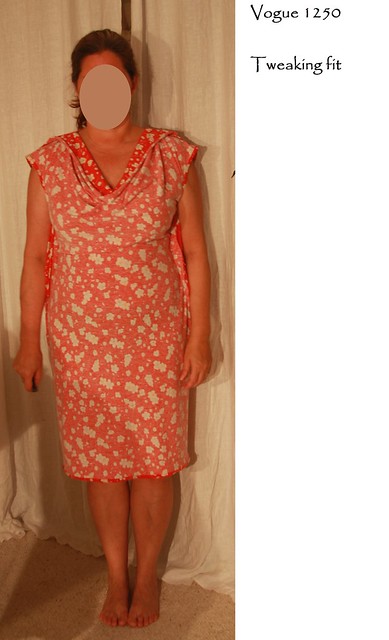
I had a lot of fullness under the bust across the abdomen and it seemed all over.

Turn the dress inside out and try it on, and pin the side seams to fit.
1250 tweaking Inside out

Take the dress off carefully to avoid those pesky pins and place on a table.
Straighten the pins out so that they form a continuous line and are more or less symmetrical on both sides.
Your corrections might look like these.

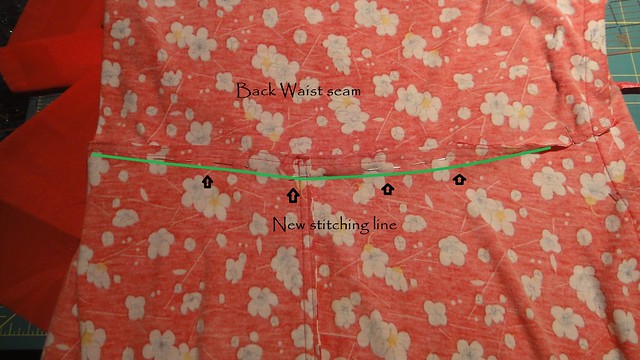
The sway back addresses the little pleat that formed at the small of the back.
Swayback

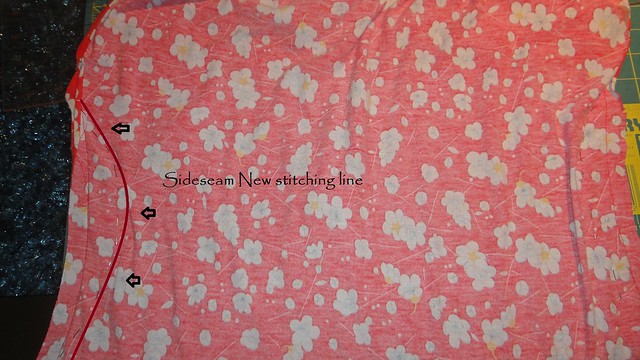
Fullness under the bust was addressed with a curved side seam.
New sideseam

It's worth it to baste this dress and try it on first.  I made these alterations on a dress that was already completed and fortunately the armholes and center back seam were not affected.


The First Time Around

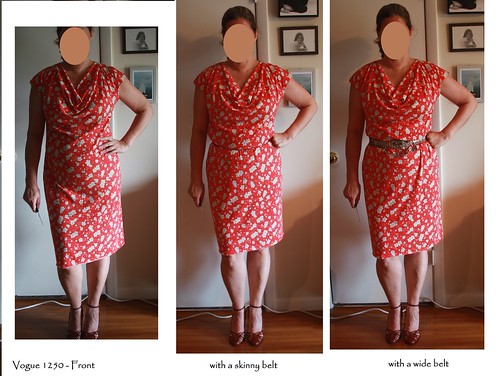
So many of these have been reviewed already, it has turned into a very popular pattern because of the cowl and it's very easy to make. I would say this is about a two hour project (not including the time spent shopping the stash). The common observation with this is the fullness around the midsection.


On the pattern envelope they must have used a fabric with more drape than the rayon lycra jersey I used. This was purchased from Fabric.com last year. It is very lightweight and once it was washed, the surface of the fabric became fuzzy, so we aren't talking about the highest quality, so it went into the muslin pile. It is very soft and the cut edges curl, there is widthwise stretch and no stretch in the length.

The pattern was made with no alterations in this view. The skinny belt is actually 1" wide, and it disappears in the blouson. It looks best with a wide belt, but the belt has shortened the length a little, so I would lengthen the pattern.

Front 1250

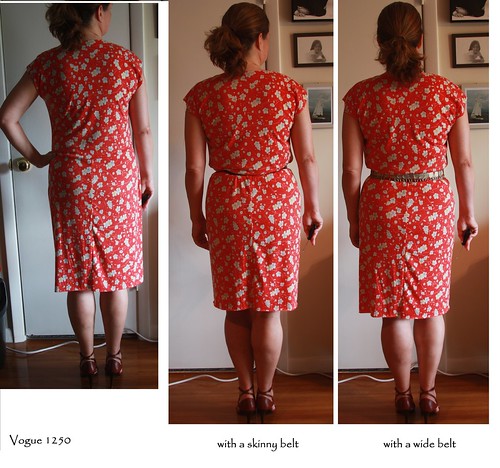
The back is very long waisted, and I could make a sway back adjustment to correct it or wear it with a belt.
Vogue 1250 Back

If I were to make it again to wear without a belt these are the alterations / changes I would consider.
- Removing excess below the bust.
- Sway back adjustment - 1" total at the center back waist tapering to nothing at the sides.
- Shifting the shoulders to get rid of upper back wrinkles
- Lengthening the pattern 1.5"
- Reworking that puckered back seam (because I know this is going to drive me crazy)

Vogue 1250 adjustments

As it is, I'll hem this puppy up and wear it around the house :)

Some people didn't have to make all of these alterations, as the Sewing Fanatic noted in the comments, she made it up here in three different versions and it looks fantastic on her.


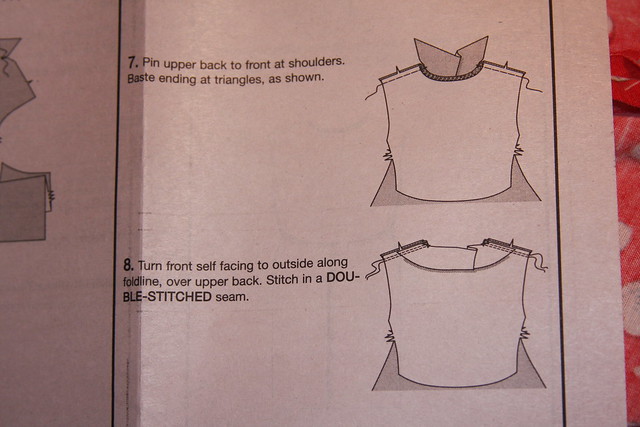
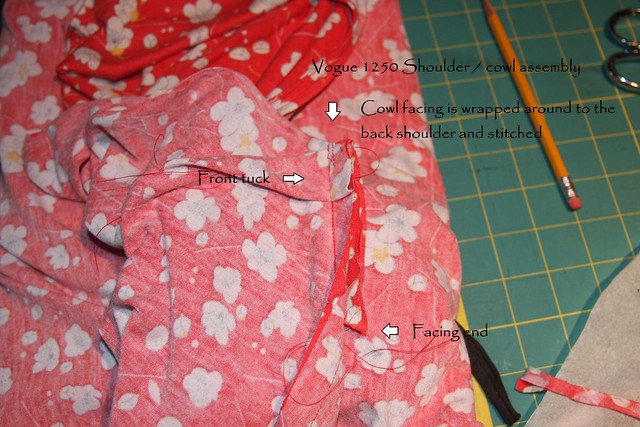
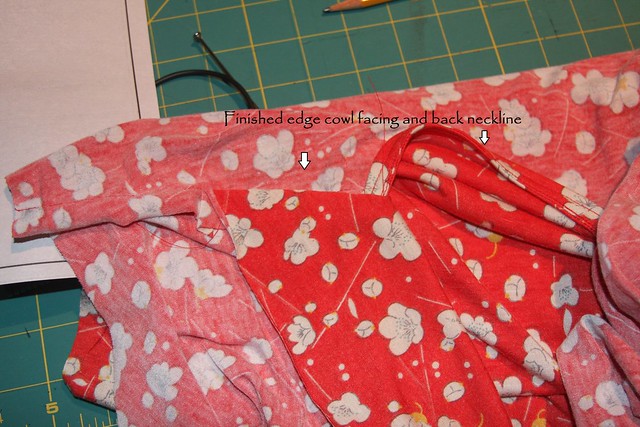
Also the only part of the instruction that could be confusing is the cowl facing instruction.
The illustrations don't show you the front tuck but if you match the shoulder edges it will show you what you need to do. All the edges should match.

035

033

034

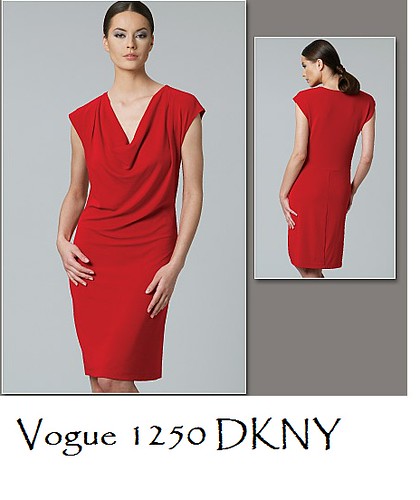
VOGUE 1250 dkny