
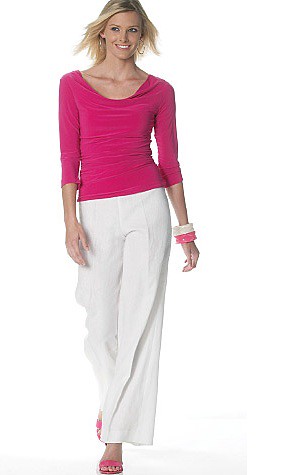
This pattern looks so simple, well it's not really that simple. It is lined, I like the lining, it cuts down on the clingy property of the poly knit I used. So you don't see bra markings as you would with say a simple t-shirt.
The lining and fabric are joined at the neckline to start, then you gather around the center back and side seam waist. You are told to pull the lining out of the way as you assemble the body, and lastly, you assemble the lining, then you pop in the sleeves. I will treat the lining and body as one next time, and remove the gathers, just to change things up. After I posted the review, Pati contacted me to let me know that the pattern could be used with or without the lining (as you will see below).
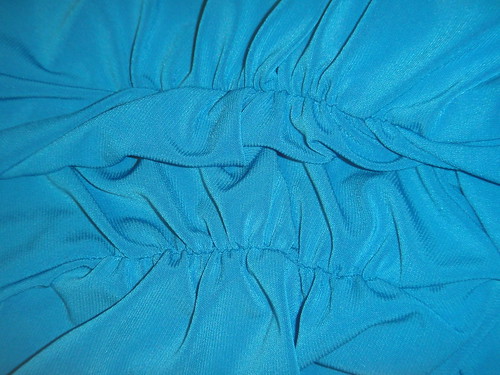
Here is an interesting detail, that I think many might be squeamish to try, but one of the reasons I like the Palmer Pletsch patterns. They are mini tutorials.
The instructions recommend using contrast colored thread for the shirring. It's a great idea, since you can see exactly where the stitching line is and it helps you line it up for joining the side seams.

Then you pull it out, which isn't difficult at all, and your gathers are perfect.
The 1 Yard Frankenpattern
I only had 1 yard of this lovely rayon knit and needed to make the pattern fit. I decided to remove the shirring, lining, and made it a cap sleeve. There are 5 pieces to this pattern, when you look at them side by side, the body pieces are longer than the lining. That's because the shirring lengthens the piece.

Front Pieces

For the front, I traced off the body piece, from the side seam notch up (armhole, neckline), and the lining piece from the side seam notch down. This gives me the fold over for the cowl (for a clean finish), and eliminates the shirring.

I used the lining piece for the back of the t shirt.

The sleeve piece I placed on the fabric, as much as I could to capture the cap and 4" down the sleeve seam. I later played with it, folding it up to make it even shorter to get the right sleeve length. They have a short sleeve option, but I just didn't have enough to make it.
This was a perfect solution for me, because I knew the pattern already fits, I like the armhole and sleeve draft, and it all fit on 1 yard of fabric.


No comments:
Post a Comment