Tuesday, July 23, 2013

Self Draft Maxi Dress

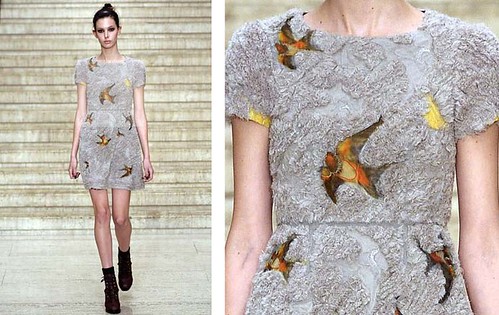
You've seen a million of these this summer, so decided that it might not be a bad idea to make a fall version.  This one has a fuller skirt than most, and can be worn loose or belted.

I already had a good start with a favorite tank top.  I liked the depth of the armholes, neckline and racer back, so this took the guesswork out of the top part.


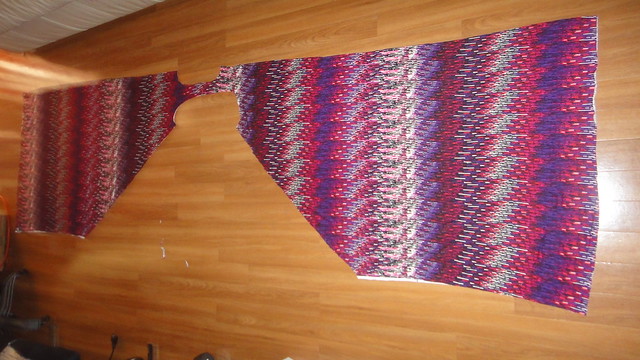
Here's what the pattern looks like. It uses the full width of the fabric, and will need further shaping at the side seams, just a slight taper from armhole to hemline.  In this fabric which is a rayon jersey (thin but with weight and drape), 2 3/4yds were used for a floor length dress.  I would recommend more if you want to shape the hem to floor length, instead of the curved hemline you see here.
Maxi dress pattern


Side seam shaping next....at this point I slipped the dress on and pinned until I liked the silhouette.
Maxi dress

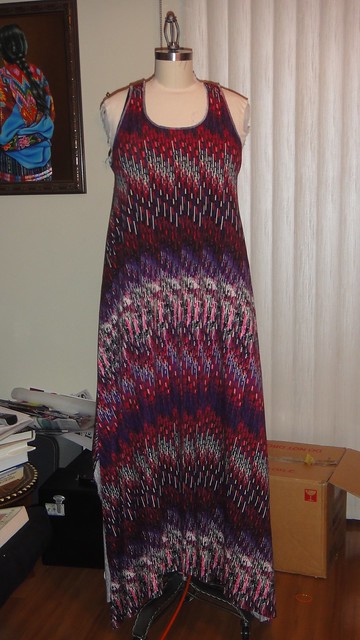
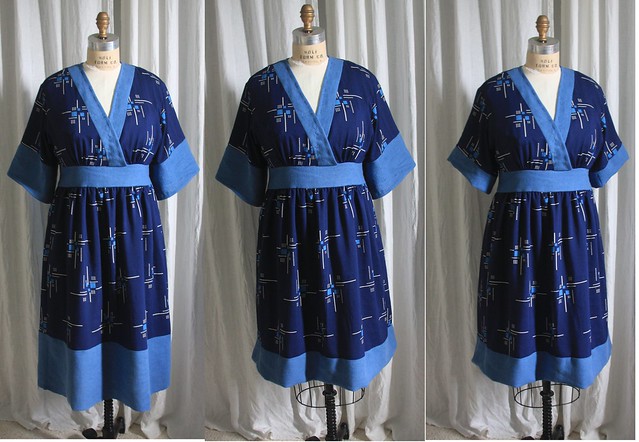
Finished!!  The neck and armholes were finished with a contrast black binding.
002

003

004

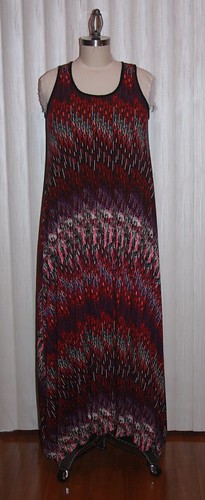
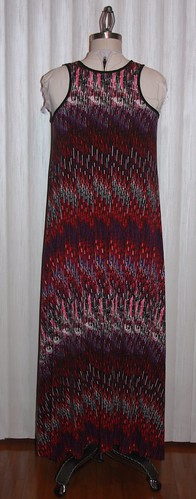
It's less of a straight skirt silhouette and more of a tent shape, but the stripes create a nice downward curve on the finished dress. You'll notice that the pattern does not match  Since there is no shoulder seam, and the print has a direction it wasn't possible.  
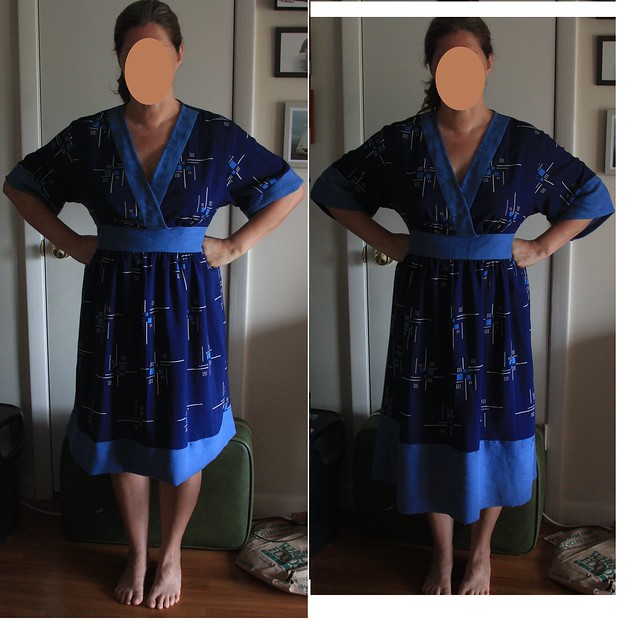
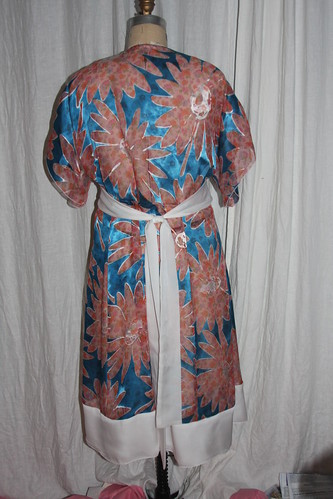
With a belt

005

Fun and easy first draping project if you are keen to do one. 

Snoop Shopping - Erdem Chiffon Swallow Dress

Do you remember this Erdem dress from Spring 2010?  I loved this dress (for a much younger thinner person), it is very romantic, and I also loved the birds and the texture they achieved with the chiffon.

Spring 2010 Erdem dress swallows

I had the opportunity to take a closer look.
Here we have the main motif, since the print does not have sharp edges, they have solved it by running a chain stitch to outline the bird, and some essential details, along with a satin stitch around the neck.
DSC02220

The other motifs, some of which are easy to identify and others less so.
DSC02221

DSC02222

DSC02223

The dress itself is pretty amazing when you consider that all of the texture is simply bias chiffon layers that have been sewn on a chiffon background.
DSC02225

It is lined in silk charmeuse, in a coordinating print.
DSC02226

Of course this goes back to my textile envy post, these fabrics are manufactured for the designer.  I couldn't begin to imagine how much yardage went into this dress, or how it was manufactured.  So this is one of those fabrics, while not impossible to make would be cost and time prohibitive.... but if you really wanted it...
Erdem swallow

Monday, July 22, 2013

The Kimono Dress Project (Duro Kimono Dress)

Duro Olowu 2011

Courtesy of Barney's NY.


Duro Olowu won the British Fashion Award in 2005 -New Generation Designer.
You can see his original dress here on Dress A Day.

From NYMagazine.com from his 2007 collection.
"Since arriving on the London fashion scene in 2004, Nigerian-born Duro Olowu has impressed the right people with his vibrant mix of African prints, seventies tailoring, and unlikely color combos. A high-waisted patchwork boho dress—known as the “Duro”—put the brand on the fashion map, and became a cult item in 2005 after being discovered by American Vogue editor Sally Singer and Julie Gilhart of Barneys."

Then there were the other versions...

Tracy Reese kimono dress
Drew Barrymore in the movie "Music and Lyrics"

This is the one that made me take notice of the dress, I liked the side panels and contrast fabrics.

That set me out to look for patterns, and there were a number of bloggers who had already made their own versions using these..

McCall 5137 OOP
Butterick 5031 OOP (but still available on the McCalls website)
Simplicity 4072
Butterick 4849 OOP
Serendipity The Torii Tunic Pattern 

Kimono dress patterns


McCalls 5137

side by side duro McCalls 5137 with band


So how is McCalls 5137 like the Duro?  

It has kimono sleeves, neckband, hem band.


How is it not like the Duro?

The skirt is more A line with a curved hem, the Duro is more like a dirndl the side seams are straight and the hem is straight across with no curve.

The waistband is wider and has a tie, the Duro has a narrower waist band and no tie


The neck facing is wider on the pattern.

There is no back neck facing on the pattern.

There is no option for a long sleeve version on the pattern.


NEXT


Butterick 5031

Kimono's side by side

How is Butterick 5031 like the Duro?


The neckband is closer in width to the original dress

It has kimono sleeves
The hem is straight and the skirt side seam is straight
It has gathering at the skirt under the band
It does not have a tie on the back, but a zipper as the original
It has a long sleeve version

How is it not like the Duro?

The top crosses instead of having a facing
There is no shaping to the waistband
The contrast bands are narrower than the original
It has gathers under the bust over the waist band

Note: The contrast sleeve and skirt bands on the right photo of Butterick 5031 are not hemmed the pattern was intended to look like the pic on the left.


I played a little with the proportions to see what would suit me best.


kimono proportions

From left to right.
Far left - hems are not folded
Middle - skirt hem is folded
Far right - sleeve and skirt are as originally intended following the pattern instructions.

In the end you have to play until you find what looks best on your body.

5031 on a body blank


You'll also notice on the Duro, that there are no gathers under the bust, in the Butterick 5031 version it was the same but really didn't suit me at all, so it had to be tweaked.


There was something about the bodice fit on the kimono dress that was bothering me. When my arms were down there was excess drape around the breasts. So I played with it a bit, wrapping the tie, playing with the widths on the front facing and yoke, and for this version finally settling on a shoulder adjustment.  The adjustment also improved the unfortunate pattern placement making the two large flowers on the bust area look a little less obvious.

Playing...
bodice fit


Once I pinned the shoulders up, things started to look a bit perkier :), and without the excess it makes the outside bodice line more streamlined, it also resulted in less width at the sleeve opening as well as less of a blouson back. Most Importantly it raised the neckline as well, which was a concern. If this pattern were made in a stiffer cotton, it might be ok.


Added the shoulder slant and shortened the front & back bodice.
008

So it meant reworking the back facing
Reworking the facing


Now we are really finished.
009

012

Wednesday, July 10, 2013

Valentino: The Last Emperor

I saw this in the theater when it was first release and now it's available on youtube.  The youtube version is not subtitled and there are stretches where they are strictly speaking Italian, but it's fun to see the fashion shows, the construction process, the friendship between Valentino and his partner Giancarlo... and the pugs.

Valentino: The Last Emperor

Tuesday, July 9, 2013

The Lined Knit Top, Version 1 - Original and Version 2 - 1 Yard Frankenpattern Palmer Pletsch McCalls 6282


 This pattern looks so simple, well it's not really that simple.  It is lined, I like the lining, it cuts down on the clingy property of the poly knit I used.  So you don't see bra markings as you would with say a simple t-shirt.    

Mccalls 6282

The lining and fabric are joined at the neckline to start, then you gather around the center back and side seam waist.  You are told to pull the lining out of the way as you assemble the body, and lastly, you assemble the lining, then you pop in the sleeves.  I will treat the lining and body as one next time, and remove the gathers, just to change things up.  After I posted the review, Pati contacted me to let me know that the pattern could be used with or without the lining (as you will see below).

Here is an interesting detail, that I think many might be squeamish to try, but one of the reasons I like the Palmer Pletsch patterns.  They are mini tutorials.

The instructions recommend using contrast colored thread for the shirring.  It's a great idea, since you can see exactly where the stitching line is and it helps you line it up for joining the side seams.

6283

Then you pull it out, which isn't difficult at all, and your gathers are perfect.

6284


The 1 Yard Frankenpattern
I only had 1 yard of this lovely rayon knit and needed to make the pattern fit. I decided to remove the shirring, lining, and made it a cap sleeve. There are 5 pieces to this pattern, when you look at them side by side, the body pieces are longer than the lining. That's because the shirring lengthens the piece.


Front Pieces

For the front, I traced off the body piece, from the side seam notch up (armhole, neckline), and the lining piece from the side seam notch down. This gives me the fold over for the cowl (for a clean finish), and eliminates the shirring.


 I used the lining piece for the back of the t shirt.


The sleeve piece I placed on the fabric, as much as I could to capture the cap and 4" down the sleeve seam. I later played with it, folding it up to make it even shorter to get the right sleeve length.  They have a short sleeve option, but I just didn't have enough to make it.

This was a perfect solution for me, because I knew the pattern already fits, I like the armhole and sleeve draft, and it all fit on 1 yard of fabric.

Monday, July 8, 2013

Vogue OOP V2410 Tropical Wool Pants & Couture Techniques

Have you ever played hide and seek with your lining fabric.  I could have sworn I had black, but could not find it, so I'm using a cotton lawn fabric for the pocket lining and Hong Kong finish on the seam allowance.  A little color in a drab pant.

There are a few interesting details in this pattern, the pocket and the waistband have caught my attention.

YSL OOP pattern 2410

I had a little fun with these, and auditioned some metallic thread to use for the topstitching.  I just love these little Featherweight bobbins.

Metallic thread on tropical weight wool


The Pocket

The pocket on these pants is formed first by creating the finished pocket opening.  (Pant leg wrong side up, pocket lining right side up).


 Then basting the lining piece to the pant front (The basting becomes a guide for the self fabric pocket piece that will cover the lining edges) .

 When you turn it over you have a lovely finished edge.


 The final step- take your self fabric pocket piece, turn the 1/2" seam allowance on the bottom and long edge of the pocket piece and topstitch down.  The stitching will show on the right side of the pant, and the underside traps the lining piece and gives you a nice finished interior. 


This is what they look like finished, you can barely make out the topstitching.

Side view 2410

I was very surprised that there was no stabilizing required for the pocket edge, and I might add a little organza strip the next time, just to make sure the pocket opening doesn't stretch out.

The Waistband
The waistband finish was also very interesting, it is  prepared without the inside lining (just the interfacing), turning and securing all of the seam allowances first.
Couture technique waistband

Then the lining piece is prepared by folding back the seam allowance at the fold line, joining the folded edges by hand.  It makes for a very flat lying waistband.
Inside waist

Hit the Button Box
007

Forgive the rolled up t-shirt, these pants are wide legged and very comfortable and fluid.

Vogue V1220 Embroidered Cotton Spandex Shirting and Fabric Defects in Cutting Layouts

Really comfortable and very cute, it even nips in at the waist, 


and it has pockets,


and I can never get enough of using my vintage buttonholer.


I left two buttons undone at the hem for this shot, now that I've worn it for a little while I can say that it needs a little something to keep it closed at the center front bust, otherwise it does open a bit.  This was a problem I didn't have on the other DK style (wrap blouse OOP pattern 1961) because it was cut on the bias, this pattern is not.  The dress on the envelope is made up in a dark charcoal, which I think is perfect for this style.  It's just the type of fabric I would walk right by because unless it's made up in a dress I would think it boring.

Here I've rolled the sleeves up a little more and used a contrast belt instead of the self fabric belt.
I'll be making this one again.

011

Fabric Defects

I loved this fabric, but I received it in a mystery bundle shipment.  While I lay the fabric out to be cut, I noticed some defects.  If this happens to you, this will make it easier to avoid them turning up on your garment.

  It's like nothing else I have in the stash, but as I was laying it out I noticed some irregularities.  Some black circles were darker than others on the back, so I flipped the fabric over and had a closer look.  Now we know even industrial machines have tension issues.

The circles on the top pic, are on the back of the fabric.  The pic on the bottom are also on the back, notice that the ones below are darker, and it's the same design repeat.

I'll do my best to avoid the light band, where it looks as if they were changing threads out on the embroidery machine because around that same area on the face, there are loose thread ends.

The front piece on the pattern is very large, so it may be difficult to avoid this area.  If it can't be used, I'll pop this back into the stash, with my notes and look for something else.

Here's how I've marked it to avoid cutting into the areas.... painters tape:)  I've marked the areas with defects, then again at the selvage so I can leave these areas as space between the pattern pieces.