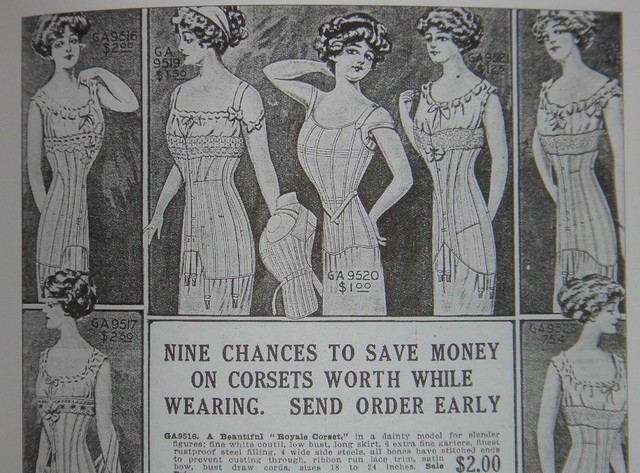
We have determined that this silhouette would not be in line with the fashions of 1912. Too much of a waist curve this is a civil war era silhouette below.
1912 looked more like this...
Bridges on the Body blog, has a 1911 sew along, complete with pattern and instructions for alterations. It's worth checking out if you are interested in the Titanic era corset costumes. The sew along started at the beginning of the year, but since I've made these before, I'm hoping to play catch up.
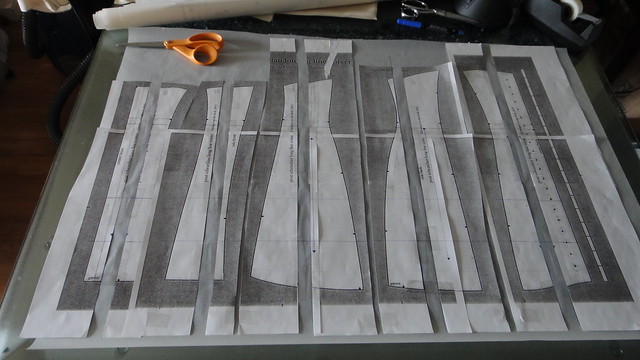
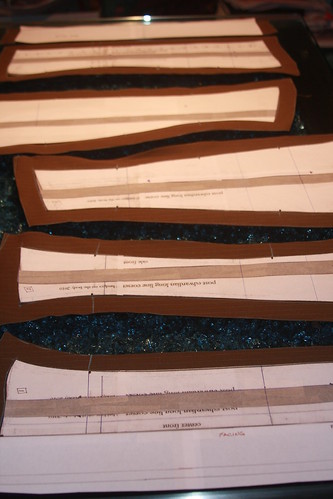
I have enlarged the pattern (at Office Depot 278%) so far, and have used my very sophisticated light box to overlap and paste the pattern pieces together.

Now that the pattern pieces have been joined, I'll be scaling them up to my size.
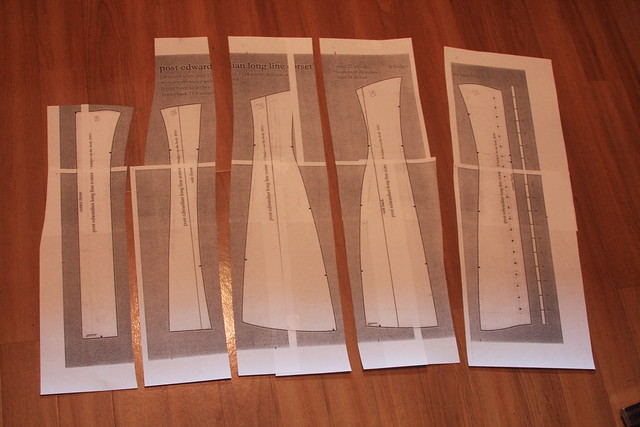
I separated the pattern pieces for the 1911 corset, only to have to join them again to draw in the lines that will be used later to split and grade up for size. So if you are making it, don't separate them. If you do, it's no tragedy, you can tape them back up and continue.
Next step is ....Measuring yourself. If you want to follow along it's this post "Measuring" on Bridges on the Body blog.
Having a sewing buddy is not always feasible, so for those of us who have to measure ourselves, I hope this might help you in the future. For the measurements around the body, I take a length of 3/8" elastic and tie them at the levels I need to take the measurements.
The first was at the waist, for this project the instruction was to find the point at which you bend, and that becomes the waist, so that was the first elastic.
Two other measurements further down so two more pieces of elastic.
Then I measured and placed them at the 6 1/2" and 9 1/2" points and straightened as best I could in front of a mirror until they were straight.
Once you have the elastic around the body you can make adjustments and move them to where they should be straightening out as you go along.
Then using your measuring tape take the measurements.
Voila!! My corset measurements.
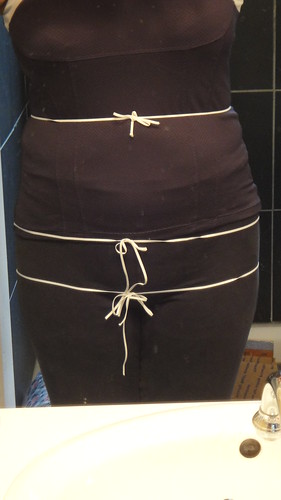
I'm not this slanted in real life, this is what happens when you try keep your camera out of another bad bathroom pic :)
Then following along to the slashing and spreading the pattern (which gets us closer to our sizes) and instructions on this post at 1911 Corset sew along.
Finishing seamlines
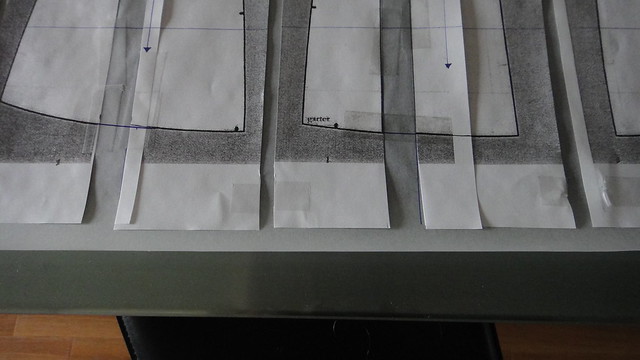
Remarkably, she's right, the final hip measurement will be about an inch off (too large for me) and can be dealt with by taking up a hair at each hip seam.
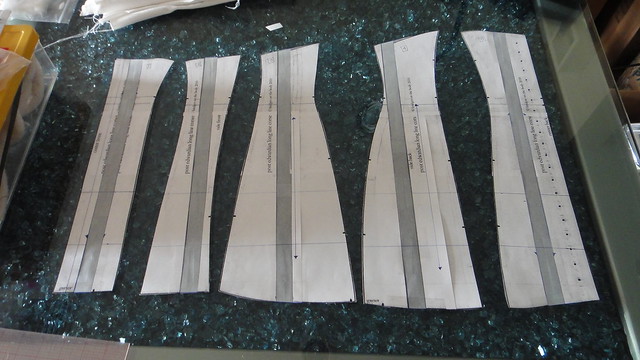
Final pattern pieces for version 1.
She does a really lovely job of the step by step instruction without overwhelming you with information, so if you've ever wanted to make a project like this, I highly recommend her sew along!!
The pattern has been sized for a first attempt, so cutting will be later in the day. Then the project will be put aside until the missing corset supplies arrive. In the meantime, I have a lacing strip for the muslin version, and construction notions have been put in a box to keep my supplies organized waiting for the next pieces to fall into place.
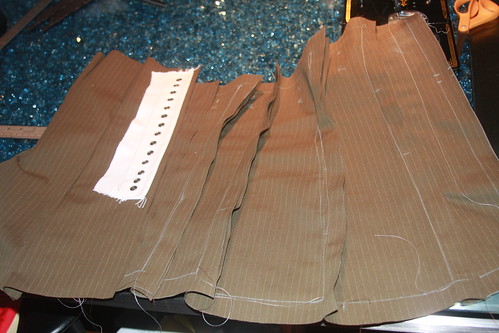
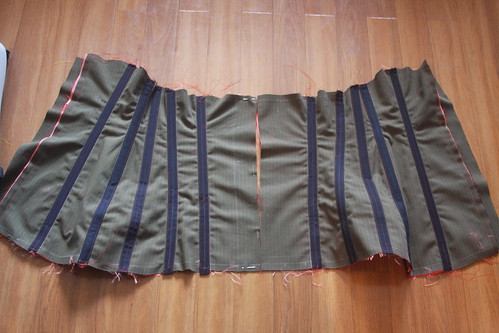
Possible candidate for the muslin (or finished project), olive pin striped canvas.
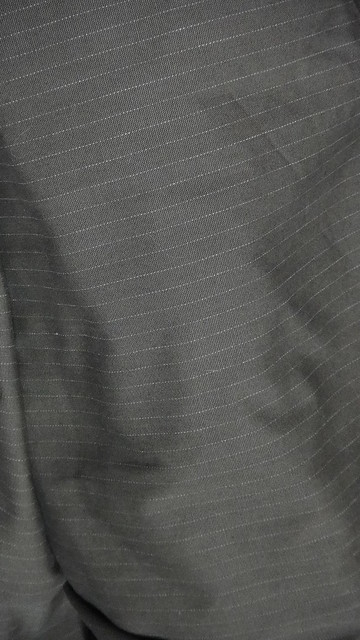
There is time for a few more steps before the busk and bones arrive. Like cutting out the muslin version of the corset out. This is a Marc Jacobs cotton canvas purchased last year, the pin stripes will be good reference points for construction and following grainlines exactly.
Following the Bridges on the Body blog....
Add 1" seam allowance to all pieces except center back.... I also skipped ahead and added the facings.
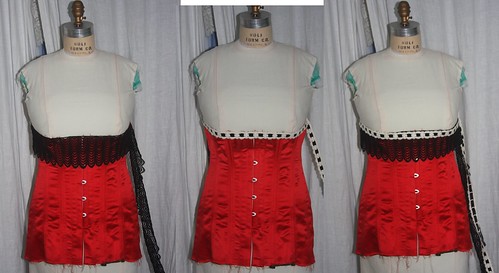
It is surprisingly comfortable to wear. It allows me to sit, but not slouch, it really is an excellent pattern.
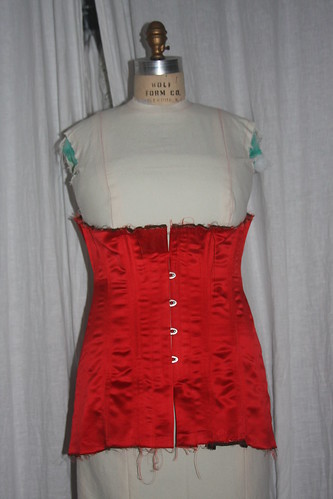
It's tough to see from these photos on the dress form, but it is a good fit.

Tweaking will be minimal. I have identified a few places where I have to shave off some width, but I like the shape it has, so I'll be taking all of the seams in about 1/4", which should give me that distance I need for the lacing to spread a bit. I'll be spending the day, getting this right, getting in and out at my leisure, and taking time with it. There's a bit more to consider before the coutil comes out.
I'm glad to go through this extra step, as it will make the final a little easier.
Today is the day to get this corset tweaked. Yesterday, I was so excited to have something I could actually get into, that I jumped into it to see the finished result. Simply too tempting to not try on. Now back to the instructions on the "Bridges on the Body - Adding Lacing Strips and Boning"

I really jumped ahead and added the self facing to the front and cut the separate facing for the back. I thought this might be the muslin as well as the finished garment, today will determine that.... and I've determined that I will cut into the coutil instead. I'm really kicking myself at not buying more of the coutil in a nude color. At some point down the road I will have to source it again.
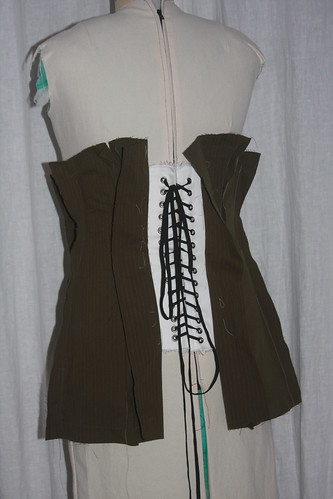
The gap at the center back looks more reasonable now, about 3 1/2".
There is a slight v when it's on my body vs. the dress form 1" larger at the top half. I'll be letting the top out for the 1" so that the gap is even.
The only change made on this version is taking 1/4" off each panel, and popping the boning into the side seams (DIY style).
I think I'll be shaping the hem on the front so I can sit without the corset fabric bunching up, which will be worse with a much stiffer fabric. I'm pleased with the progress though and I'll be transferring the changes to the pattern next.
BOTB - really goes into great detail about what considerations (and unintended consequences) need to be taken into account for end use comfort. These things take time, and thought, and moving around in the garment, and role playing (not really just testing if you were paying attention). Since I already have a chemise to wear under the corset, fitting will include that going forward.
Lacing has been a bit of a challenge, I'm looking forward to have that front busk in so I don't have to play Gumby and reach around to tighten the laces.
More tomorrow...Anxiety highs and lows. I didn't give much thought to how complicated a flat lined corset would be to construct, so joining the pieces were easy.
Then came the boning and that perfectionist in me started panicking. How am I going to line up the tape so that I don't have messy lines on the front? I had to sleep on it, and am happy to have that step completed.
The base fabric is the same used for the muslin, a pin striped cotton canvas.
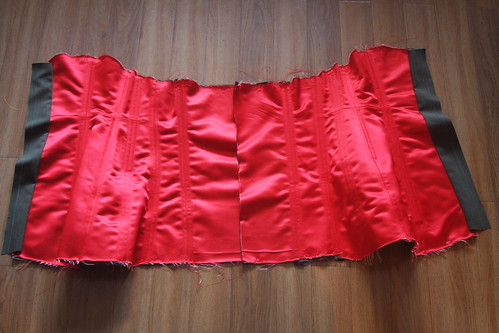
This is the face side with the bones inserted in the casings, it looks a little wrinkled but on the body looks much better. You can see the hip fullness starting to take shape.
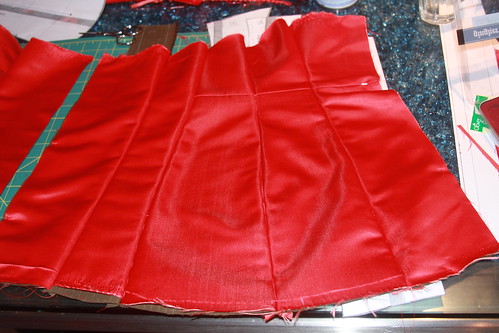
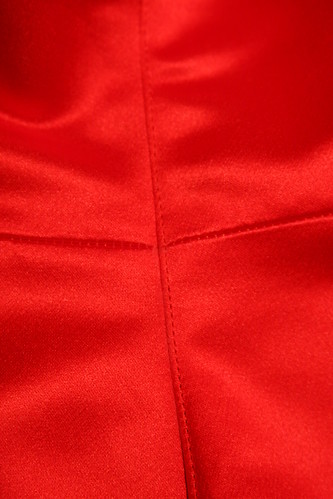
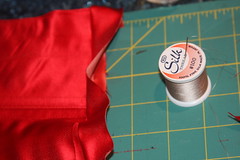
The red is a silk satin repurposed from a bride's maid gown.
Here are some other pics from earlier steps...
Since I was short on satin I had to piece it to make up some of the panels.
The pile of trimmings from the inside seams, the process before the casings are attached.

I've made progress, so quickly that it's surprising to me!!
What's different from the last post?
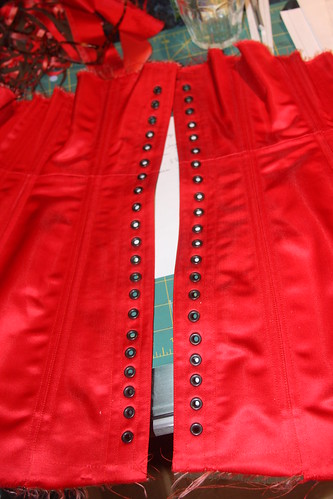
Front facing was completed with busk inserted.
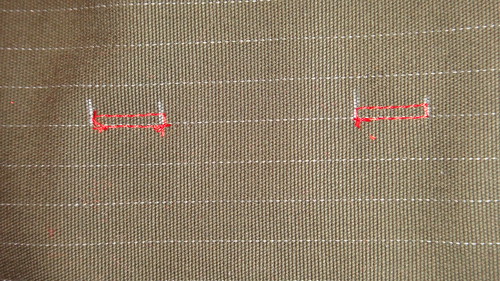
Slitting the fabric was period correct for busk loop openings, but with the satin raveling like crazy, I sewed little squares and cut in the centers to slide the busk loops through.
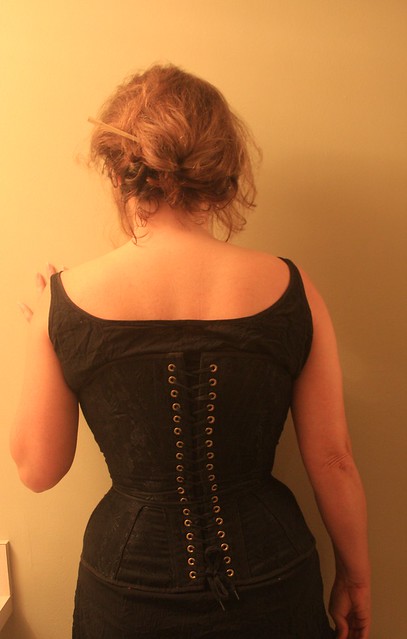
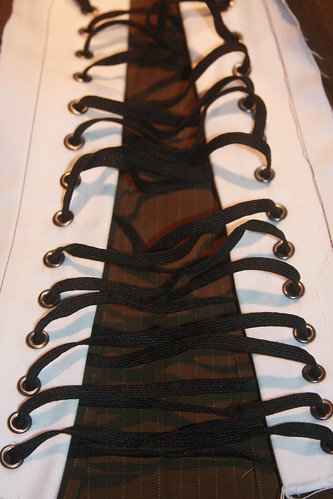
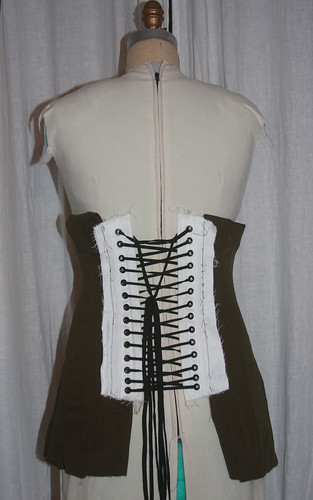
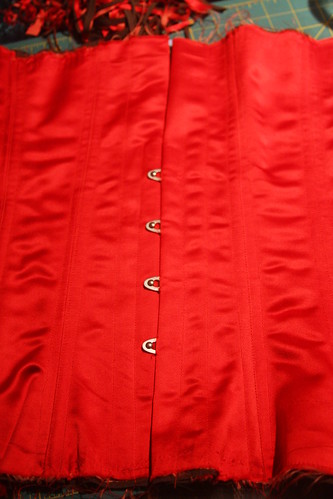
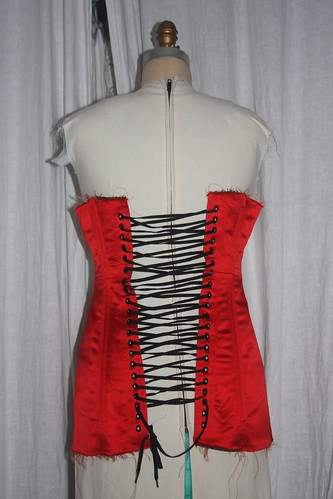
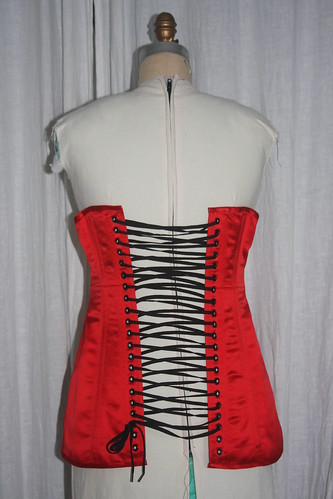
Back facing was sewn and the grommets are added.

Grommets
Then the lacing was inserted. It's loose on the dress form waiting for the final fitting tomorrow.
I'm up to week 7, on Bridges on the Body, and making bias will be the next step.
For now it's finished. The bias edging on the top and bottom were hand sewn and getting through the cotton canvas layer was challenging. The canvas was difficult to get a needle through, so don't try this at home.
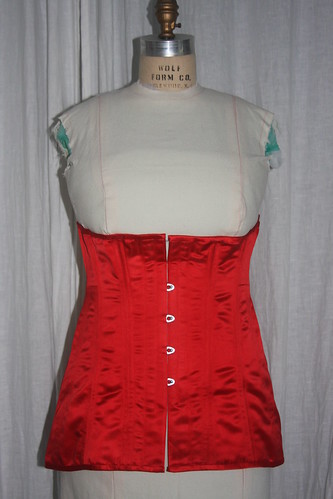

I have some options for trimming the top, but the more I look at it, the more I think I will leave it plain. I can always go back and add things to it later.... I really like the idea of black beading, or a black lace overlay.
The cord used for the lacing on the back was from my stash, so it's a little shorter than needed. I'll put the double faced satin ribbon on my list of "difficult notions to find locally".
I've also decided not to add the garters, so I'm veering away from the historically accurate version. I have to say, if you are making a first corset or a third, this really is a good experience. My first was the Civil War era corset from Butterick, which was good but didn't have a muslin, or the explanation for the required gap in the back, so it was a bit of sewing blind.
A big thank you to Jo at Bridges on the Body, I'm really pleased with the way this turned out.


No comments:
Post a Comment