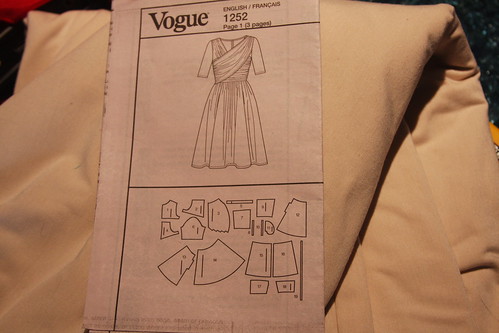
It's been a year since I purchased this pattern (seems like yesterday).
It's sitting on the fabric purchased specifically for this project, loved the drape and weight but not so crazy about the color. Then you'll remember I changed it.
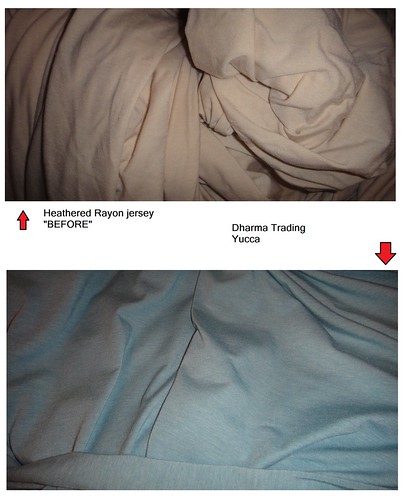
Really a big improvement.
Funny how a little thing like color can derail a project with so much potential.
So let me tell you about this dress, I saw a woman wearing the designer original and it was very cute.
I was wondering how closely the pattern actually matched the original (we shall see).
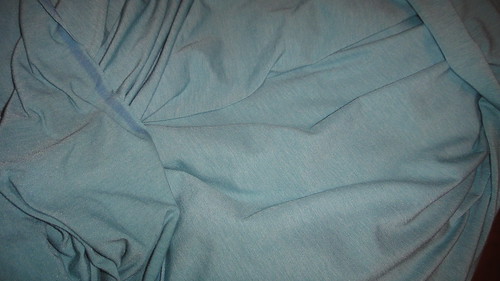
Today was spent marking the fabric and reading the instructions, and separating fabric pieces.
There are a lot of pieces to this dress, and it's lined so double the number. It's a project that had you had to pay attention to layout, a few key pieces that are cut once, and some pieces cut once from fabric, and twice in lining.
It was cut out at the beginning of the month, and I'm very happy that I kept the pattern pieces with the fabric.
Here's some progress on the dress, more tomorrow.
I was wondering how closely the pattern actually matched the original (we shall see).
Today was spent marking the fabric and reading the instructions, and separating fabric pieces.
There are a lot of pieces to this dress, and it's lined so double the number. It's a project that had you had to pay attention to layout, a few key pieces that are cut once, and some pieces cut once from fabric, and twice in lining.
It was cut out at the beginning of the month, and I'm very happy that I kept the pattern pieces with the fabric.
Here's some progress on the dress, more tomorrow.
With 7 minutes to go, I had thought I would finish it today but it wasn't to be.
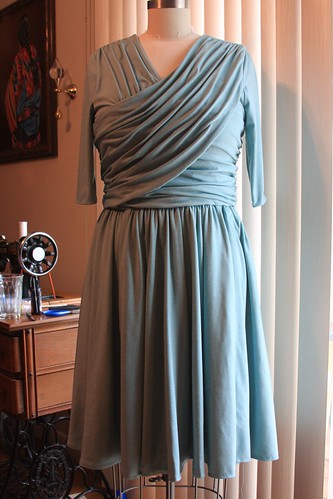
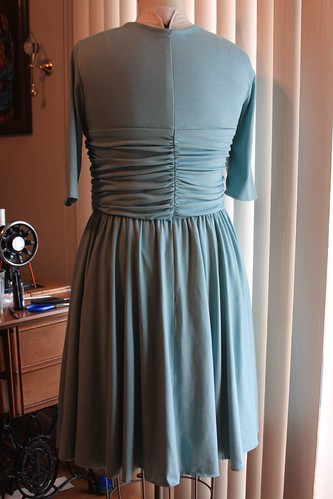
This is one of those dresses that you can't tell how it's going to turn out until you are finished.
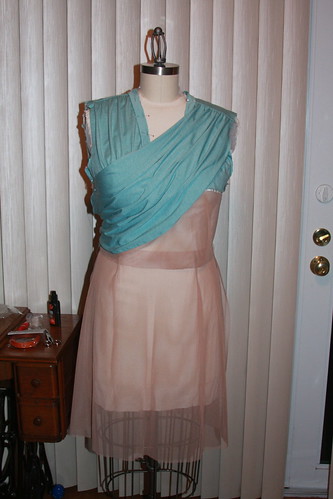
I managed to drape the dress pieces on the form, just to give me an idea of how it was going,
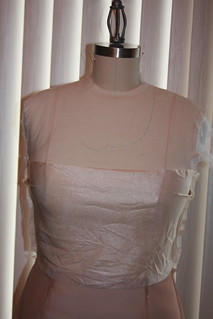
I started with the mesh lining, and that looked ok, then layered the different pieces on the form as they were completed.

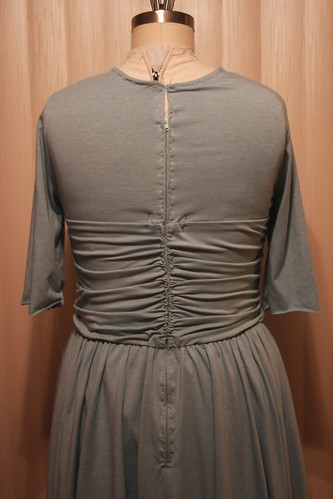
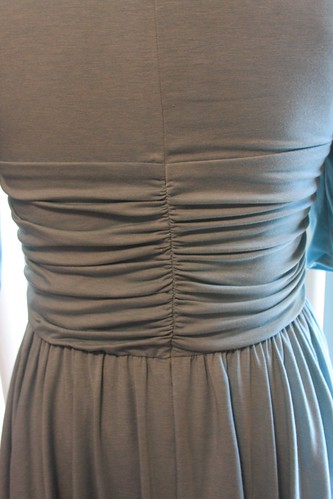
What was first apparent is that the bodice piece was going to be too wide. I wanted the ruching on the midriff to be tight.
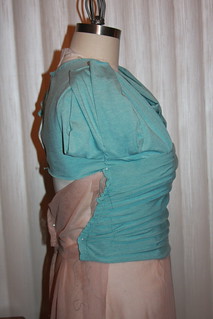
So I trimmed off a wedge at the waist side seam to tighten things up a bit.
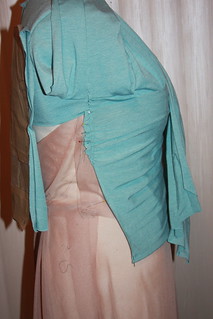
Then discovered, the mesh they recommend had too much stretch, so I recut another front and back bodice piece in tricot. You need something with lengthwise stability. Further down the road, the ruching will be tacked onto the lining piece.
Here's where we are, I can't move further because the zipper length on the envelope says 20", and what is really required is 3.5" longer, so back to the store tomorrow.
The 20" zipper is basted in here. Hems, hook and eye, zipper and tacking is all that is left to complete this project.
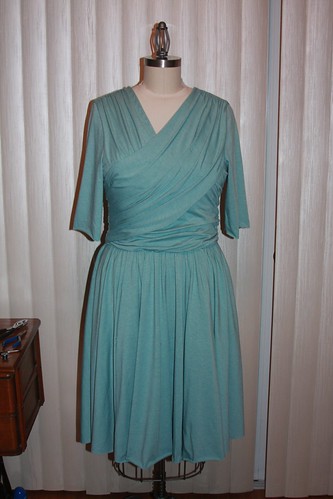
If you are thinking of making this dress, make sure and find a very thin fabric. The area around the neckline will be 8 layers deep and quite thick. After more hand finished details and some more tweaking, I am very happy with the way this has turned out. It looks better on the body than the dress form.
THE ZIPPER
This is zipper number 2....
It turns out that Joann's does not carry a 25" zipper, so I had to make due with a 22". After hand picking the zipper into the back, I really did not like the way it looked. Let's overlook the basting stitches, the ruching actually pulls away from the center back exposing more of the zipper, and that does not look good.
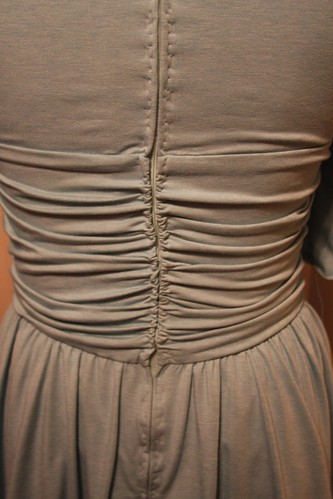
Now the pattern instructions call for sewing in the zipper 1/8" from the edge of the center back, which means over the ruching. This fabric is so soft, I had no confidence that it was going to feed properly and I wouldn't be faced with picking out all of the stitching later, and maybe even leaving holes in the fabric, so I decided that this might be the way to go. Something to take the pressure off of those points that were the most bulky and pulled away the most from the center back.
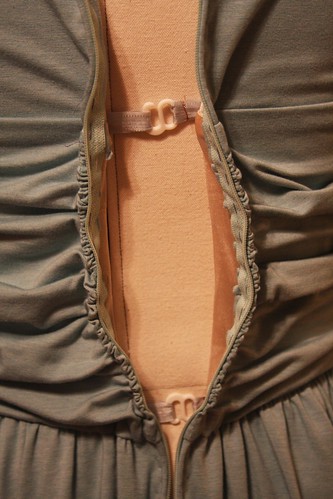
This didn't look too bad, but I found it was nearly impossible to get those hooks latched on my own once I was in the dress......and then there was that gap at the top .... grrr.
The pattern just calls for a 20" zipper, it didn't specify invisible, so after much pondering, I tried to slip the dress on with the zipper closed. So another hour and the zipper was eliminated altogether. It's a little tight around the elastic waist, but I think it looks much better.


No comments:
Post a Comment