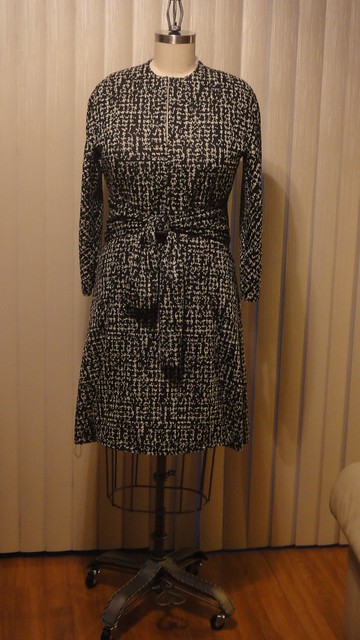
For all of my belly aching yesterday, I am very happy with this dress. It is a very flattering style, it's comfortable and the print gives it a bit of an edge, although it does hide all of the top stitching. I ended up using 3 bobbins worth of thread on it. So aside from the instructions yesterday, and a few other changes to the assembly order, and assorted tweaks, it went together fairly quickly over 4 days.
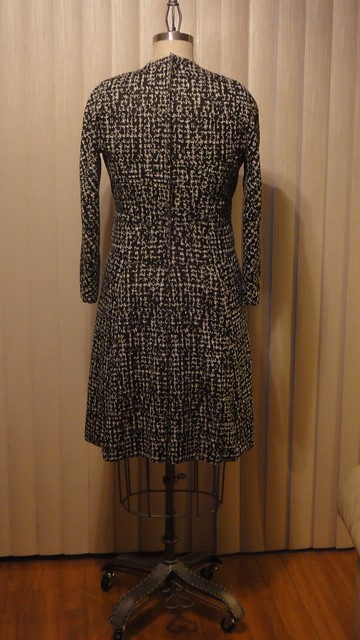
A few things to keep in mind, this is a double knit, they also recommend other fabrics that have no stretch. Don't use them. The neckline is very deep, I shortened the slit and the placket before cutting. Pick a fabric that looks good on the back as well as the front because the backside shows on the front ties. Read on for clarification on some pattern quirks.
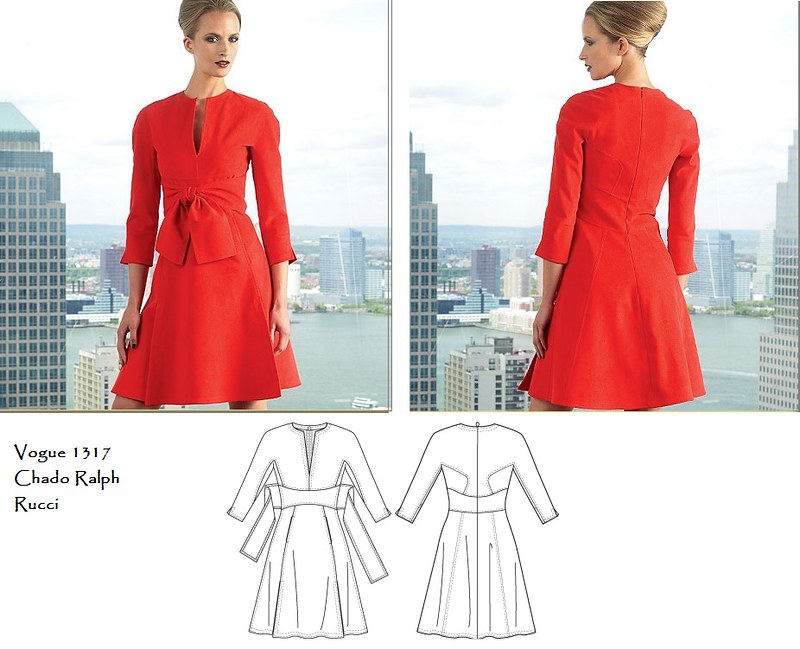
Here's the pattern envelope and the line drawing to jog your memory.
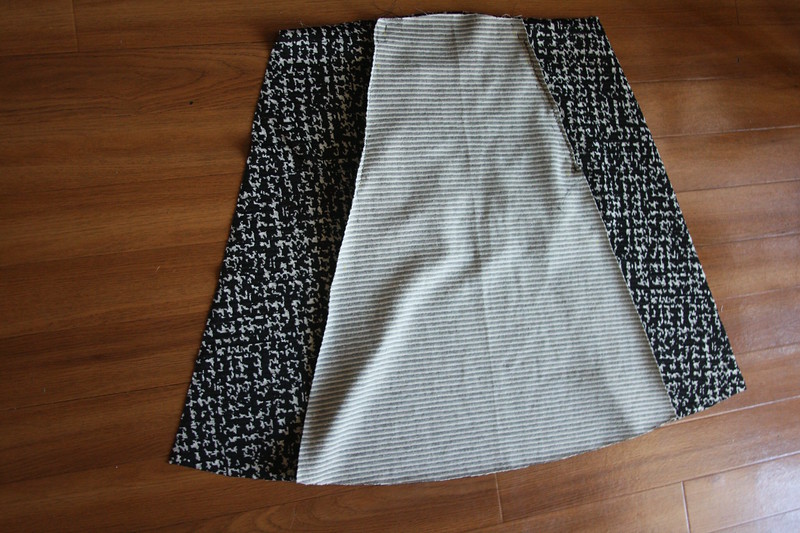
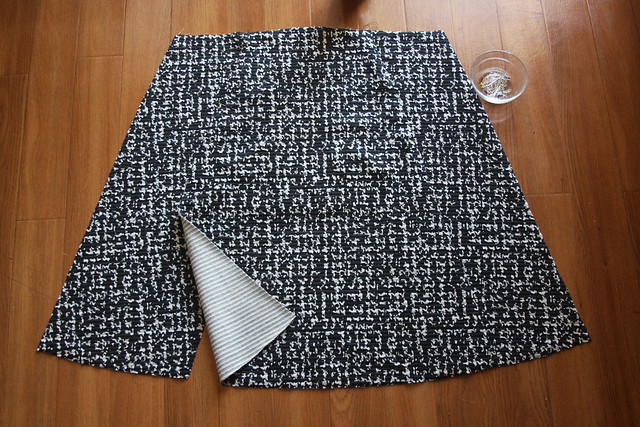
There is a mistake in the instructions, which will give you the skirt below :D.
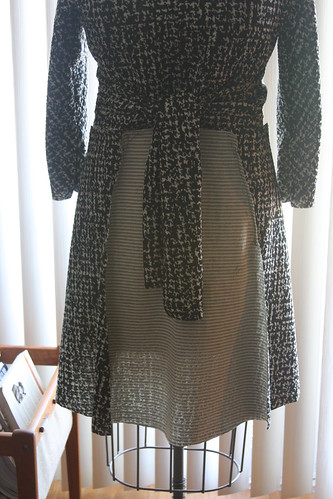
Here's a version of this dress that's never been seen on the runway, you might call it an exclusive design, or a wadder. Now this isn't really how it would look if you followed the instructions to the letter, it's actually worse than this, so read on if you are planning on making this pattern.
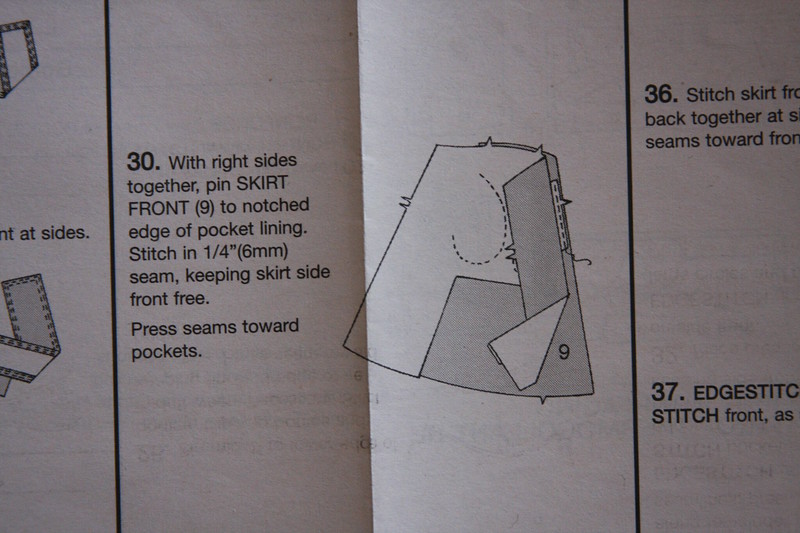
. If you are making Vogue 1317, be advised that there is an error in the instructions. I was making progress on this dress this weekend, taking my time, cutting out on Friday, marking on Saturday and assembling on Sunday. Here it is Monday Step 30, the diagram shows right sides facing one another, that is incorrect, that will give you the skirt above, with the wrong side of the fabric facing out.
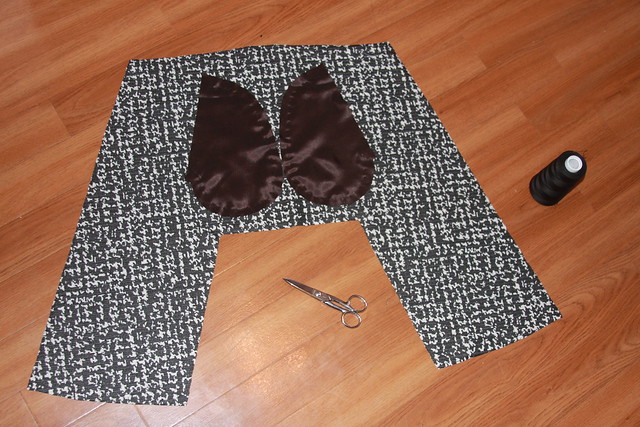
I'll play along... ok why aren't my pieces meeting?
They match in the diagram, but not on my garment, let's check the pattern pieces. When I match small circles it's about 1/4" shorter, the edges do not meet as detailed in the instruction diagram.

Eventually that seam allowance will be caught in the fold of the topstitching at the pocket opening, but why give yourself such a small amount of fabric to catch? Do yourselves a favor and add that 1/4" to the pattern piece before you cut the lining out.
The instruction to place right sides together will give you this.
Hmmm that doesn't look right... and if you follow the instruction to turn right side out, the center piece will end up to the right, exposing the pocket lining beneath.
STOP AT STEP 30
Do yourselves a favor and with piece 9 (the center piece), before joining the piece, reinforce the two large circles which mark the pocket openings, clip to the stitching line. Place the piece 9 (center panel) on the u shaped piece 8, and join the pocket lining to piece 9 sewing between the large circles (RIGHT SIDES UP, as the diagram above, not as step 30). Fold the seam allowance under and top stitch, it will look like the right side of the diagram above. Then proceed to "EDGESTITCH AND TOP-STITCH". This is a lapped construction which is unusual but totally acceptable if explained properly.
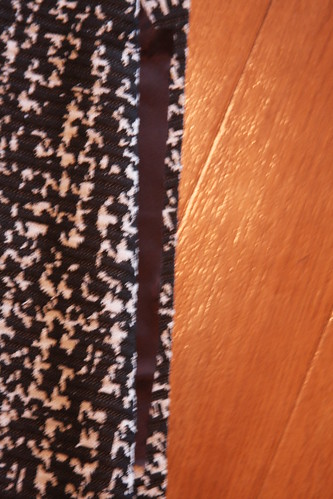
I would have shown you on my garment but as you see it would not be much help, it camouflages all topstitching.


No comments:
Post a Comment